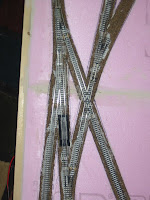
Last week I purchased a 30 degree crossing and the remaining strips of cork roadbed that I needed. This weekend I was able to devote a large chunk of time to working on the new layout. This time let me make significant progress.
I finished layout the roadbed down. I started laying down the track in the area around the interchange. In the process of doing this I ripped up the track from my old layout to salvage switches and long sections of flex track.

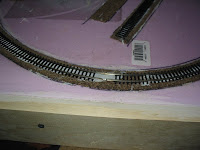
I was very happy with the way my flex track joints turned out. You can see an example of one in the picture. I secured all but the last few inches of the the flex track to the roadbed using a thin coat of caulk and track nails to hold it in place, the caulk did most of the holding though. This let the rails lengthen/shorten to somewhere near their final length. I cut the longer rail so the two rails were even and removed the last few ties on the end of the piece of track. I also removed the first few ties from the new piece of track to be joined in preparation. I used rail joiners to secure the rails together and then solder them while they were straight. When the rails were bent into their final position, the joints shifted slightly but not enough to hit the ties still attached to the rail. The result was a smooth curve. I was very pleased.

After all this was done I attached feeders to the rails. I had to do four feeders since I had used insulated rail joiners to separate the different sidings. Once I finished the wiring, I was able to have a test run. All went well with the exception of one block where I accidentally reversed the feeders.
A few more switches are required before I can complete the layout. They have been ordered and I hope they will arrive before this weekend.


